How to Make a Bliaut: Step by Step instructions by Mistress Enid d’Auliere

Enid crown floral dress

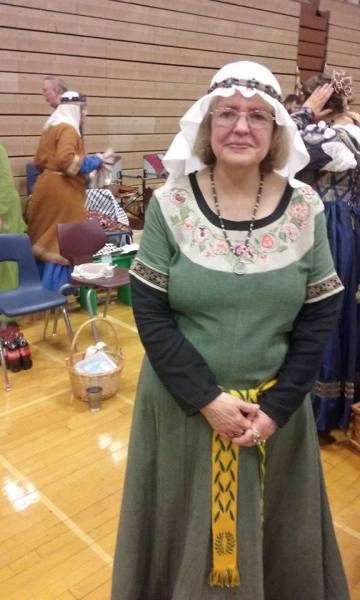
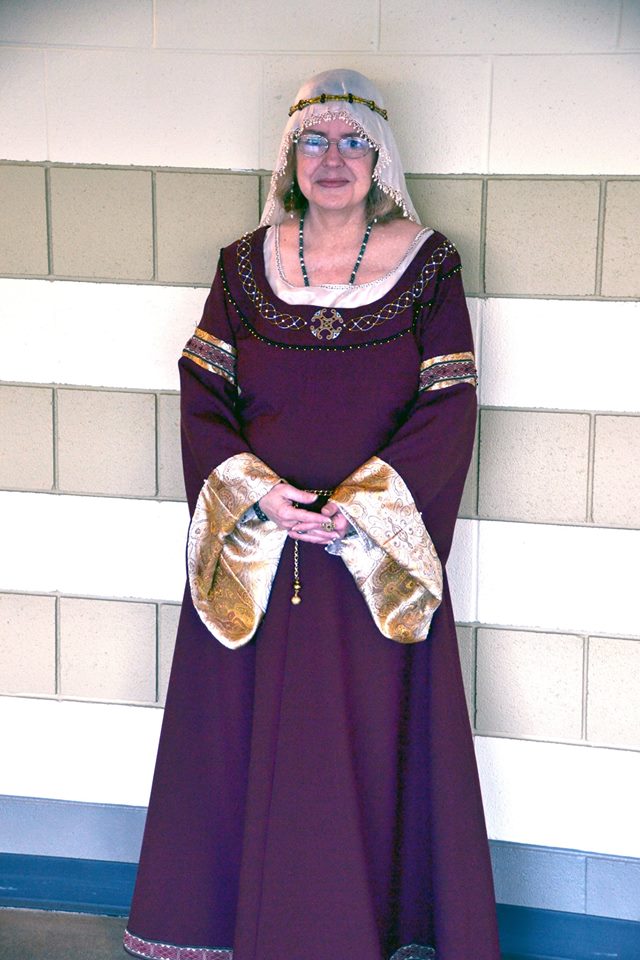
It’s time to talk about the dress that this blog is about. The Enid Bliaut. A simple gown that is easy to put together, easy to wear and adaptable in so many ways for an early period look.

This bliaut is made to be a summer gown, suitable for those warm summer events. It’s made of light, breathable fabric, and made to look like two layers when it is only one. The point of the dress, of course, is the embroidery that shows up against the darker background of the garment. We have already discussed that. Now we’re going to put the garment together.

blog bliat done in a day full

Cut the dress out according to the pattern I’ve provided with the adjustments to the sleeves.

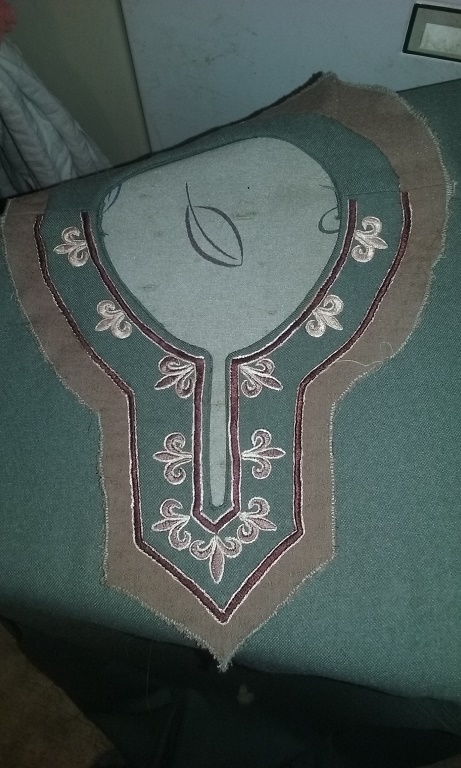
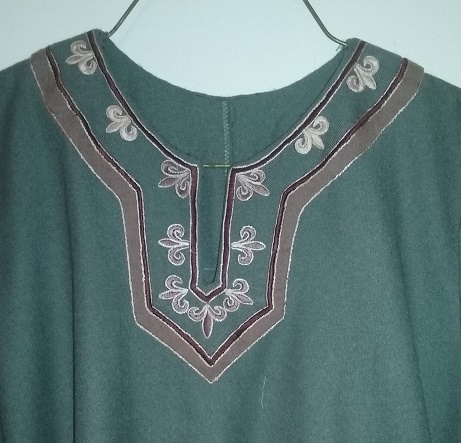
The first step is to put the neckpiece together. In this dress, I’m adding a piece of black under the embroidery to look like the neck an underdress. Handsew the top of the embroidery to the black neckpiece then handsew the hem of the black neckpiece all the way around. I zigzagged the bottom edge of the black and the embroidery pieces together. Now it’s ready to attach to the dress.

Sew the front seams together and the back seams together. Now sew the shoulder seams together. Take a moment to press those seams open. It will make your life easier in the near future. Trust me.

Once you have the shoulder seams done, it’s time to finish the neck. In this dress, we’re going to cut the neck on the green fabric almost as large as the neckpiece. Pin right sides of the neckpiece to the neck of the green dress and sew down. Clip the edges of the two pieces all the way around and press open.

Next it’s time to work on the sleeve pieces. I’ve cut a narrow piece of linen and applied purchased trim to it. Right sides together, sew the linen strip to the top of the black sleeves. It’s probably silly to include that you must do this to both sleeves, but I’ll say it anyway. Now, right sides together, sew the sleeves to the ends of the shoulders of the dress.

The next step is to sew together the shoulder seams from the wrist to the hem on both sides. At this point you have a whole dress. It’s a good time to press open the seams and clip them on the curves of the side seams so they lay open. I press these seams open though it’s likely I will adjust those seams when I fit the dress.

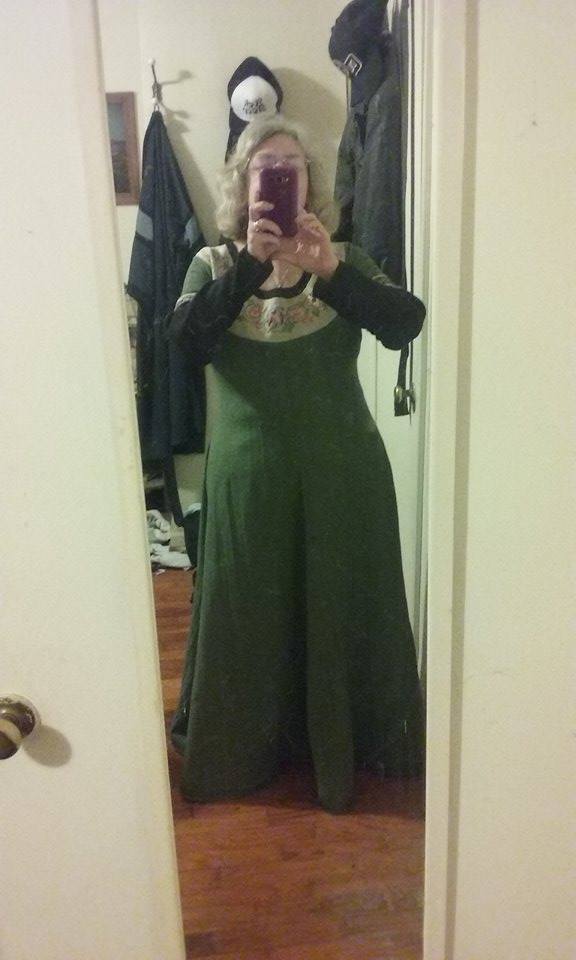
blog bliaut Marcia in the mirror

Though you have a whole dress with only hems left to finish, it is vital to fit the dress at this point in the process. I don’t have pictures of this part of the process, mostly because I fit myself and it’s an awkward display of twisting and pinning. Still, put the dress on inside out and see how it fits. Get someone to help you at this point. I usually have to adjust the back seam at the very least. Take in the seams according to the pins.

Cut the hem of the dress so it’s even all the way around. I machine sew the hem for two reasons. It’s easy and with the trim covering it, hand sewing seems unnecessary. Machine sewn hems also tend to last longer in floor length dresses. My process is to hand turn the hem under and machine sew it down all the way around. Then apply the woven trim to the edge of the hem and machine sew down both edges.

Hand hem the edges of the sleeves and this dress is done and with a quick press, ready to wear. It honestly took me 5 hours to sew this dress together start to finish. That’s not because I’m such a quick stitcher, but because this is an easy pattern. It’s a great beginner pattern for early period garb that looks good, but because it is so easily adapted to different necklines and different sleeves, not to mention coats, it’s a great basic pattern for more experience sewers as well.

I hope you enjoy the pattern and the bliaut. I’ve enjoyed writing this blog and exploring my artistic process. I have had help.

blog sewing cat


Thread Painting, The Final Chapter by Mistress Enid d’Auliere

blog emb end done and pressed

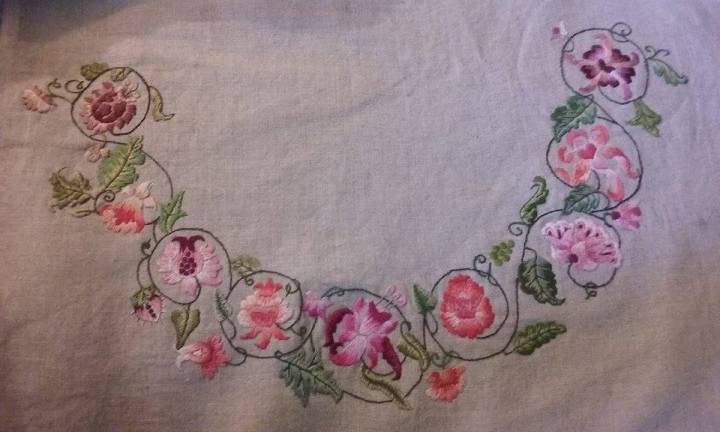
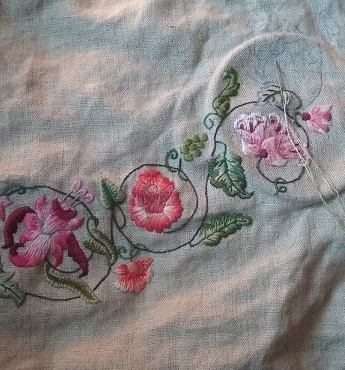
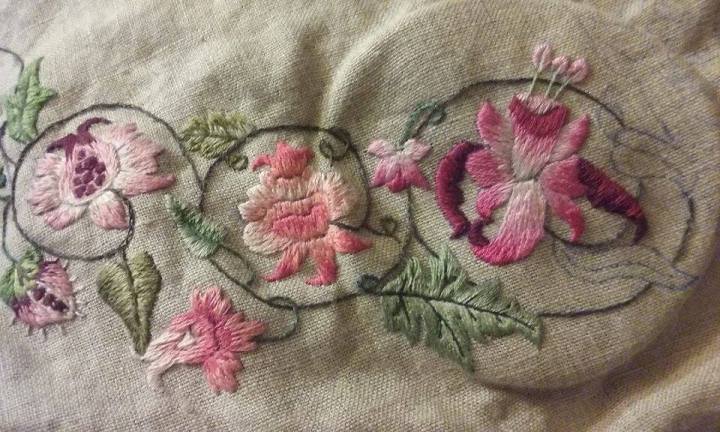
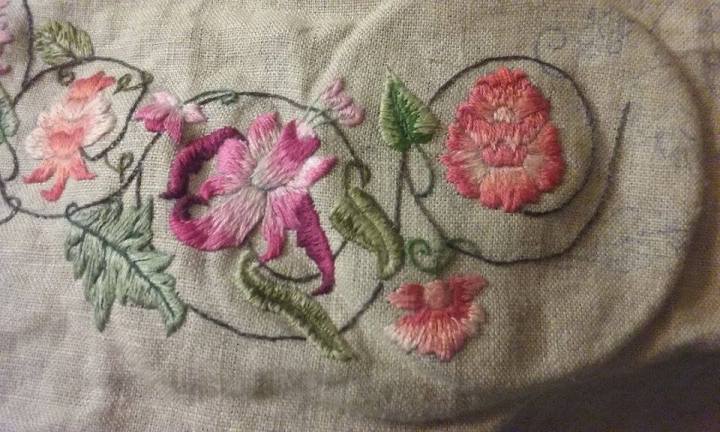
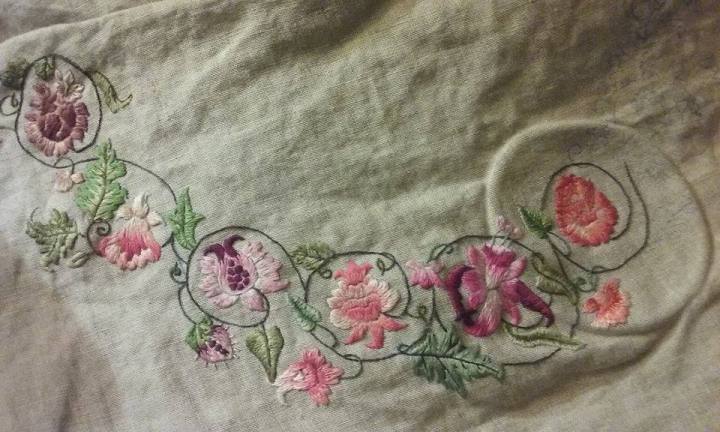
This is the final “round”, as I call them. The final flower with adjacscent leaves and buds is here and the end of this embroidery is in sight. I’m going to take a step by step approach in this final part of the work beginning with the pattern. Yes, the pattern again.  The outline of the original pattern is pretty faint. I find I have to redraw the pattern before I begin embroidering and having the original pattern handy to reference is essential.

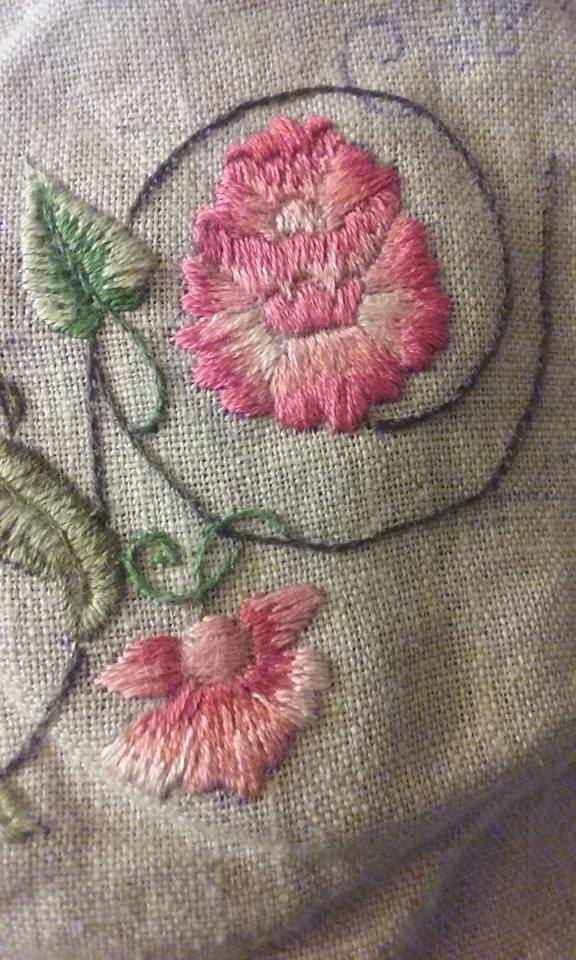
Once the pattern is clear, the embroidering begins. Thread painting is a process of layering colors onto one another. In each of the leaves, first the veins, then the light, inner color is laid down, then the darker outer color is laid to finish the leaf. It makes the leaf more interesting than using one color. Though the leaves are not the star of this embroidery, they are the main color. There is more green in this embroidery than any other color, so each leaf is important to the overall design.

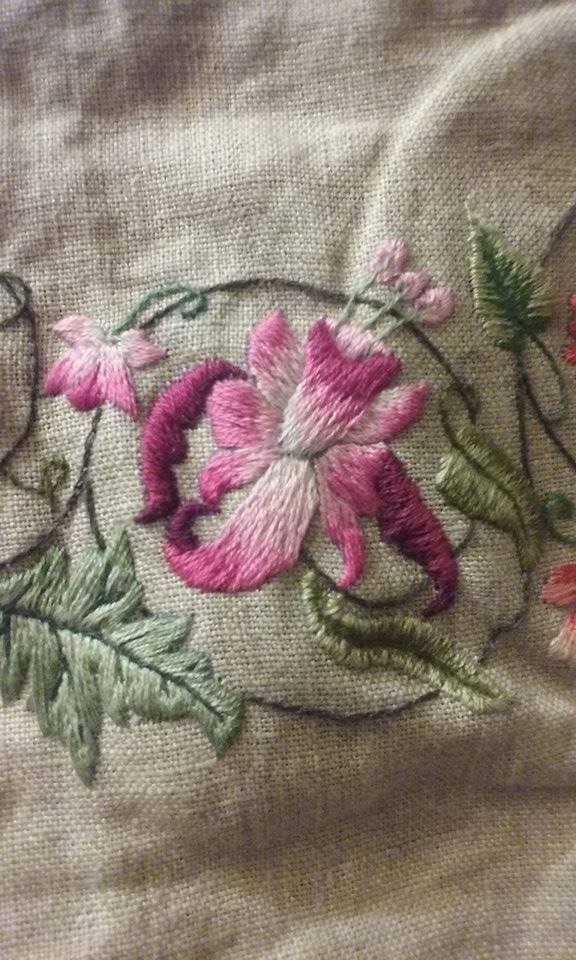
Finally, the last flower is ready to be embroidered. There are special considerations to this flower. As I said before, each flower is a new challenge. This one, though it looks simple, is certainly a challenge. How to get straight stitches to fit a curve while changing colors is the problem. The answer was tricky and took some thought and manipulation to get the look I wanted in the long, curving pieces.

The last step in this long process is to press the FINISHED (Oh, Yay!!) embroidery to remove the markings and set the threads. Now this embroidery has become a neckpiece and the next step is to make this part of a garment. And quickly. Crown tourney is coming up soon.

We have discussed previously that this process of thread painting is not a quick process or even as quick as regular, flat embroidery. Ending this embroidery is a challenge in itself. You know how when you read a long book, how getting to the end is both satisfying and a bit sad at the same time? You loved the book so much, ending it is kind of sad because there’s no more book to read? Well, this embroidery is much the same. I’m happy to get to the end of it and have it look the way I wanted. I’m sad there is no more embroidery to do and to show. I’ve taken this embroidery in progress to events and demos to show what I do, but as a gown, it won’t be as easily portable or handleable. It won’t be just an embroidery anymore, but a piece of something else. Before I get all meloncholy on you, I can always start another embroidery. Being done is part of the process. On to making that Bliaut.

Thread Painting Continued by Mistress Enid d’Auliere

blog emb flowers 1-7 better


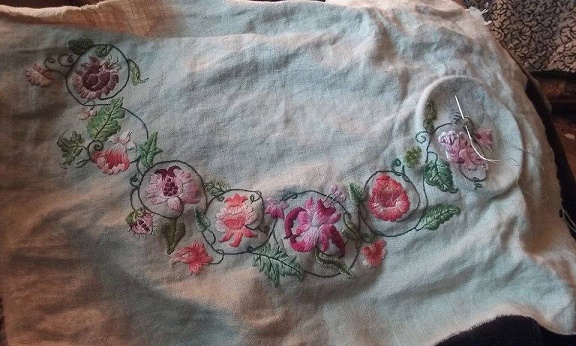
The end is in sight! Only two more flowers to go and this piece will be ready to become the neckpiece to the bliaut I have planned. Before we move on to the sewing portion of this blog again, I want to talk a bit about the technique of thread painting. The first thing you need is patience. Each leaf, every bud and certainly each flower takes longer than normal embroidery by more than twice. Which is why I planned for putting time into this embroidery, so each and every bud, leaf as well as the flowers would be shaded. Sometimes, that has been more of a challenge than others.

blog emb flowers 567

Small spaces are more challenging as there are few threads in the space to be filled in. In these cases, I do it a bit differently. Starting from the inside, I build up the space from there. Only the outer part is shaded and that is added after the rest of the flower top is finished.

So far, I’ve talked about painting the flowers and very little on the buds, leaves and other parts of this embroidery. Each leaf and flower bud has it’s own challenges. The leaves have odd shapes made more difficult by the veins. You have to think ahead about how the leaf will look, what color you want to be predominate and where to fill in the inside color and where to leave it open for the next color.


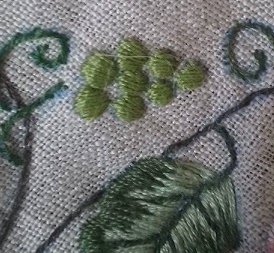
Round shapes are always different. After trying a number of ways to make a circle out of straight stitches, I learned that you have to go over a circle twice. Once going one way, the other at a 90 degree angle to the first threads. That way you cover the circle with stitches and not just part of it. It works really well and it gives the circles a bit of lift, too.

blog emb grapes

I’ve told you a lot about how to use thread painting in embroidery, how to shape your stitches and how to keep all your stitches going the same way, how to choose colors and how to go from light to dark, all those technical things. What I haven’t told you is how to find inspiration and how to know when to shade and when not to. Maybe it’s because I’m so nearsighted, but I look at things close up. I notice details and patterns in things. Because I love green things and flowers, I leave them outside where they can grow and not bring them inside where they will surely die, but I do study them (outside). I notice how the colors vary, how light works and how nothing is ever one flat color. Everything is shaded and what shades and how depends on the light. The same leaf will look different in direct light than it will in dimmer light or a rainy day. Flowers shine in the sun with brilliant colors and there are so many colors in that flower petal, it’s hard to count or replicate. I try to find that inspiration and translate it into threads, building a picture thread by thread, color by color.

Thoughts on Thread Painting and Color by Mistress Enid d’Auliere

Dear readers, I’m sorry to have been gone so long. Influenza B took me down and I’ve been in a dark and cheerless place for too long. I so missed my colors. I missed a needle in my hand and not my arm. The threads kept calling. I’m so happy to be back to my embroidery work and focus on thread painting.

blog emb 5 flowers done


What I love about thread painting, is, of course, the colors. I’m a color junkie, but I also enjoy the focus it demands. Each stitch is important. Is the angle right? Where will the next color come in to appear seamless? Do the stitches match their angles so one color disappears into the next? It takes focus and planning. In this pattern, no two flowers are alike, so each flower presents a new challenge.

blog emb 5 and 6 flowers done

With using colors to shade the flowers and leaves, the main question is light to dark or dark to light. In the last two flowers I’ve done, I’ve mostly done light to dark, keeping the light colors in the center and all the edges of the petals are darker and more vibrant colors. The colors just don’t photograph well with my phone, so they are deeper and richer than the pictures show. I needed to maximize the darker, more brilliant colors to lift the fog and brighten my spirit.

blog emb flower 5

Choosing the colors is a new challenge with each flower. The fuchsia flower has long expanses to fill, so many colors can be used, so the question is what color do you want to end with? I often work backwards from there. The orange flower had a different challenge. It had many small spaces that only two colors can be used and those shapes also had to be separated somehow from the next shape using similar colors. Changing the beginning color (light to dark) by one shade allowed me to delineate one petal from the adjoining ones.

blog emb flower 6

Each flower has to be approached individually and it’s challenges considered before I begin. I did this on purpose. I wanted a challenge. I wanted to embroider something that took more than a week to finish. I wanted to push myself. When I see how the flowers and leaves come to life with color, depth and bright colors as I finish them, it makes me happy and proud. I’m glad I let the inspiration take me here. This embroidery looks like summer and that’s what I wanted, something alive and beautiful that is a celebration of summer and flowers. On to the next flower challenge.

blog emb 6 flowers done

The Case for Cotes by Mistress Enid d’Auliere

I hate cloaks. They’re bulky, uncomfortable and you can’t do anything with them on and keep warm.

coat 14th century

Ancient Persians and Sythians both wore coats over other garments. These were open in the front and with long sleeves, and came to about mid-thigh. The Persians, both men and women continued to wear coats as part of their clothing through the 15th century.

Cote is one of the oldest words in the English language originally meaning “heavy wool garment”. This could be a heavy over tunic or overdress. The medievals wouldn’t necessarily put on an overcoat to go outside, it was nearly as cold inside. So a cote became part of the common wardrobe, a heavy woolen, warm garment. Cotes are period.

medieval coat


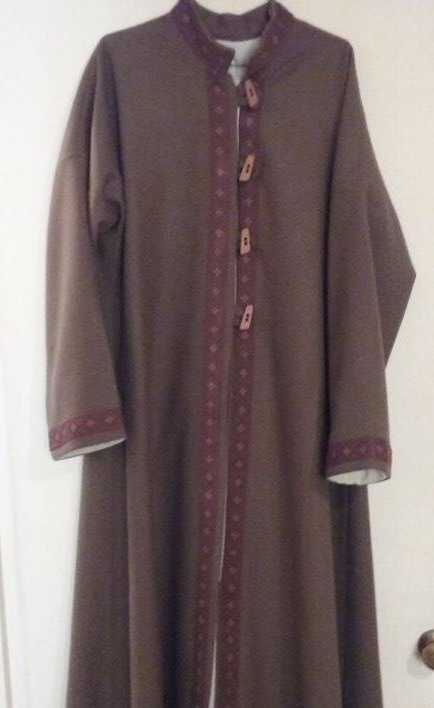
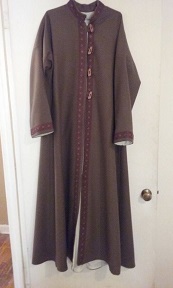
I’ve adapted this coat pattern to be more of an outer garment for the SCA. In the winter, I try to arrive at an event in garb and driving and toting stuff with a cloak on just doesn’t work. I’ve adapted my basic garb pattern to make it into a coat I can wear to events, or at outdoor events that get chilly over my garb. This same pattern can be adapted to men, just reduce the curve under the arms. I’ve added pockets to coats made from this pattern and fur collars. Just change the neck, and don’t use the collar I provided in the pattern. Shape the neck to fit the collar that you’re adding.

Pattern and Sewing Instructions for Medieval Coat

This pattern is made for woven fabrics and is not suitable for knits or stretch fabrics. You will need 4-5 yards of coat fabric (wool is my favorite) and the same of lining fabric. I fully line all my coats. Besides thread, you will need 4 toggle type buttons and 4-5 yards of trim (which is optional). I also have a fabric puller to make the fabric loops, but that is also optional. There are many ways to make fabric loops.

The collar can be as tall as you want, but I suggest 3-4 inches including seam allowance.

After cutting pattern, allowing for seams (½ – 5/8 inch) begin assembling the coat.

Step 1. Sew back seam together.

Step 2. Sew shoulder seams together on both sides

Step 3. Sew sleeves onto open shoulder seams.

Step 4. At this point, if you are adding a collar, measure and cut collar.

Step 5. If you are adding a collar, sew collar to neck. Nip the seam around to allow for the curve.

Step 6. Sew side seams together from wrist to hem, matching seams and curves. It is at this point I do my fitting. You can fit both front and back to your liking. Adjust seams.

Step 7. Repeat process with lining fabric

Step 8. Apply trim to coat (I do this by machine)

Step 9. Make fabric loops – I sew them as tubes, cut the seam close and use a fabric puller to turn them so the seam is inside and they’re tubes. Fold them in half to make a loop, place them in the center seam facing to the side seam on the right side, so when the lining is attached the loops will face the right way. Make sure they are evenly placed. I sew them down at this point so I don’t have to worry about them shifting when I attach the lining.

Step 10. Sew the lining, right sides together around the front and neck to the coat. If you have a collar, just sew the center front and leave the neck open to be finished by hand. Turn and press. Hand sew the lining to the sleeve ends, but I hem the coat by machine. Sew on buttons and you have a coat to be proud of.

This pattern is endlessly adaptable. You can change the neckline anyway you want, change the sleeves from tight to long and pointed. Add a skirt to both sides of the front pattern piece, sew up the center front, make the sleeves long and change this pattern from a coat pattern to a bliaut pattern.

How To Make A Neckline by Mistress Enid d’Auliere

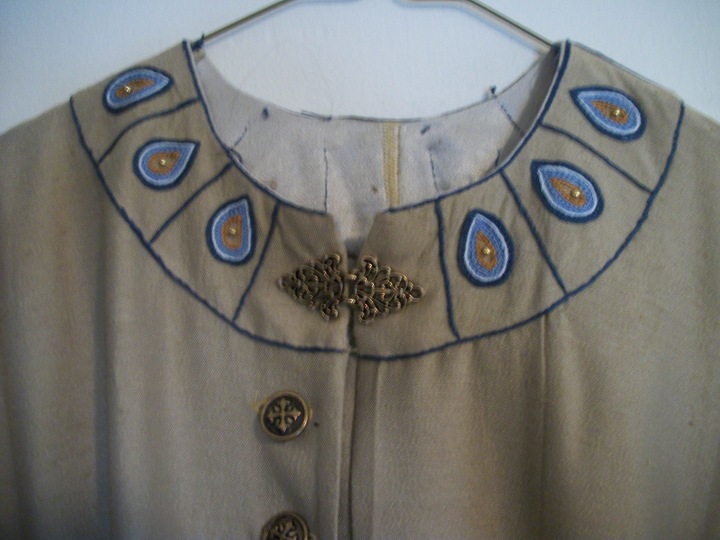
Today I want to talk about necks. For many, they are the worst part of making garb. Getting a neck to fit right, front and back, the shoulders right, is not as hard as you might think. It does take some experience and I’ve put all that in. Before I learned a few (hard learned) tips, I made all the mistakes. I made necks that were too large and fell off my shoulders, too high, too low, and just plain uncomfortable. I’ve been there and learned from those mistakes. Tip number one, necks come first. Sew the neck before you sew the sides.
2013-02-12 14.25.29

Cutting the Neck: No matter what shape of neck you’re planning, round, square, V neck, keyhole, cut it smaller than you want it to end up. That seam or any other finishing technique you use will take up more fabric than you think. You can always make it larger.

Back necks are always shallower than front necks, especially if the front neck is low. The back has to provide the structure if there is a low neck in the front. But, even if the front neck is high, it’s more comfortable to have the back neck higher. There is more of your neck in front than there is in the back. If you make the back neck too low, it will feel like it’s pulling the whole garment backwards and you’ll always be adjusting it.
blog neck brocade

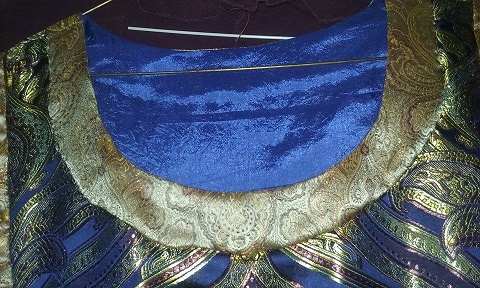
If you’re including a contrasting neckpiece, cut the pattern out of paper grocery bags first. That way you can fit the pattern to your neck before you cut it out or redo it easily until it fits your neck properly. Don’t forget to include those seams around the pattern. They’re important.

There are many ways to finish necks on garments. I’m going to go into some simple ones I use and a paper on making contrasting neckpieces. If you are lining your garment, the lining will serve to finish the neckline and any further decoration is embellishment and optional. For those who don’t want to line their garments. I’m one of those. I have enough layers already, thank you. I’m going to talk about how to finish a neckline without lining it.

The easiest way I have found to finish a neckline is to turn it under and finish it off with a simple embroidery stitch called a “blanket stitch”. I find it easiest to machine zigzag around the cut neck before I turn it under. This has two purposes. It keeps the fibers stable and it makes it easier to turn the fabric under using less fabric. It gives your fingers something solid to roll. You can just handsew a rolled neck without the top stitching I do and it will look great. I’m just an embroidery junkie. Just try it on before you finish it to make sure it fits the way you want. I use this technique on all my underdresses.

I’m putting my contrasting neckpiece handout I wrote for a class in here just as it is, so it may repeat some of the neckline tips I’ve discussed. Forgive me. It talks about using the contrasting neckpiece technique (also described as inside out facing) on a keyhole neckpiece, but it can be applied to any shape. I’ve used it on round, V-neck and square necks beside the keyhole neckpiece in the article. In this application, I’ve layered one fabric on top of the other to create the neckpiece you see. So, really, all that limits you is your imagination.

How to Apply Contrasting Necklines By Enid d’Auliere

Neck are hard. What do you do with them? How do you cut them to make them fit? How do you embellish a round neckline? How do you get them to lay properly and look good? I have heard all the questions and am going to show you the answers. It’s easier than you think.

How to cut a neck

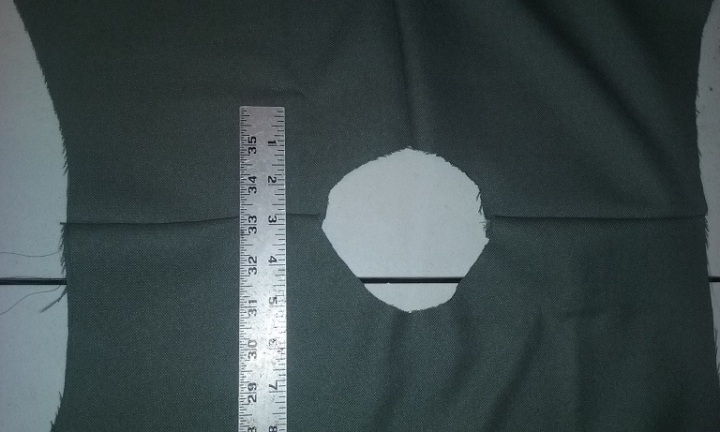
It is important to know how to cut out the neck and shape the shoulders of the garment before you begin. First, the shoulders of the garment always slope down from the neck to the shoulder end. It just fits better. Cutting the neck hole is the trick. Our necks are circular, but they are not a circle. The back neck curve should be shallow and the front curve is much deeper, depending on the individual neck. As you see in the picture above, the back is showing because it is much higher than the front, even in a close fitted neckline such as this. The second important thing to know is to cut the neck hole smaller than the one you want to finish with. The reason for this is simple and twofold. First, the seam to finish the neck will make it larger and Second, it is much easier to make a neck larger than to figure out how to make a large one smaller. I know this from sad experience.
blog neckpiece 1

Designing a contrasting neckpiece

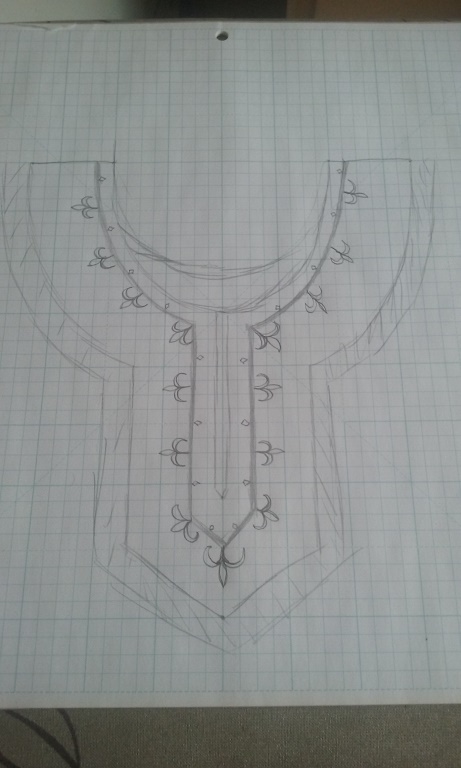
The neckpiece needs to match the curve of the neck in the garment. Begin by drawing the curve of the front neck on paper. Draw another, larger line around that curve for the contrasting neckpiece. Do this for both the front and the back neck. Make sure you include seam allowance on both the inner neck and the outer edge. Measure to make sure the outer line is even with the inner line. You can make this as wide as you want or in any shape you want. It can be round, square, V-shaped, keyhole or any shape you can think up. The neckpiece can be in contrasting fabric to the garment or match the garment fabric (showing off embellishment). It can even be two fabrics, one on top on another as in my example. Just cut one neckpiece larger than the other. What you can do with this type of neckline is only limited to your imagination.
neck piece plan drawing

Embellishment is up to the designer. I’m an embroiderer so, having failed to figure out a way to put straight trim on a curved neckline, I resolved to embroider them the way I want them. There are lots of other ways to embellish a neckpiece including, but not limited to, beading, couching and applique. Apply embellishment to the neckpiece before you apply it to the garment. It’s much easier, trust me. In this example, I have cut two neckpieces out, one to be applied on top of the other. In using this technique, I zigzag the edges of the top piece, turn the edges under (snipping where necessary) and hand sew it to the bottom piece before I apply the neckpiece to the garment. That way, when I apply the neckpiece to the garment, I will work with the neckpiece as one application and not two.

Finishing the neckpiece

Zigzag around the outer edges of the neckpiece. This makes it easier to turn under when applied to the garment. If you are doing a double fabric with embellishment as in my example. I hand basted a line around the neckline and into the keyhole as a sewing guide.

Applying the neckpiece to the garment

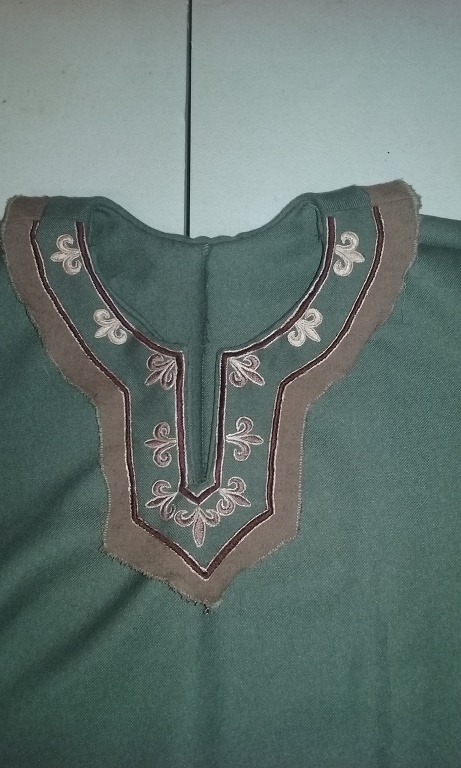
Pin the neckpiece RIGHT SIDE TO WRONG SIDE of the garment. That way, when you flip it, the right side of the neckpiece will be on top of the right side of the garment. Sew around the neck and keyhole slit. Trim all seams to ¼ inch and make a snip in the corners up to the sewing line. Flip the neckpiece to the front of the garment with the neckseam inside and press down with an iron.

Before pressing
neck flip before ironing

After pressing

neck flip and iron down

Once the neckpiece is attached to the garment and pressed, it is time to finish the outer edges. Turn the outer edge under and pin it to the garment for hand sewing. I sew it down to the garment with an invisible stitch. Often machine sewing about outer edge results in puckering and the neckpiece laying unevenly. Also, it is harder to cover up a machine sewn edge than it is a hand sewn one.

Careful finishing makes the neckpiece look great and it adds a lot to a garment. Hand sewing the edges, making sure the points match and the line is even are all little things that make a difference. Often, I will edge the neckpiece with contrasting embroidery or cording.

However you choose to use this technique for necklines, I know it will be creative and elegant. This technique can be used for either men’s or women’s garb, it finishes a neck so it will last forever and survive multiple washings.
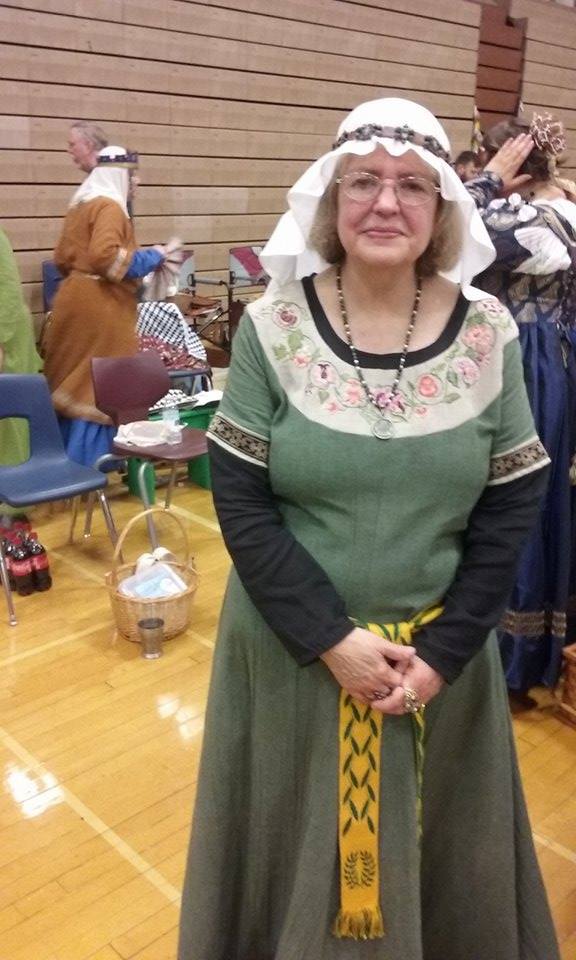
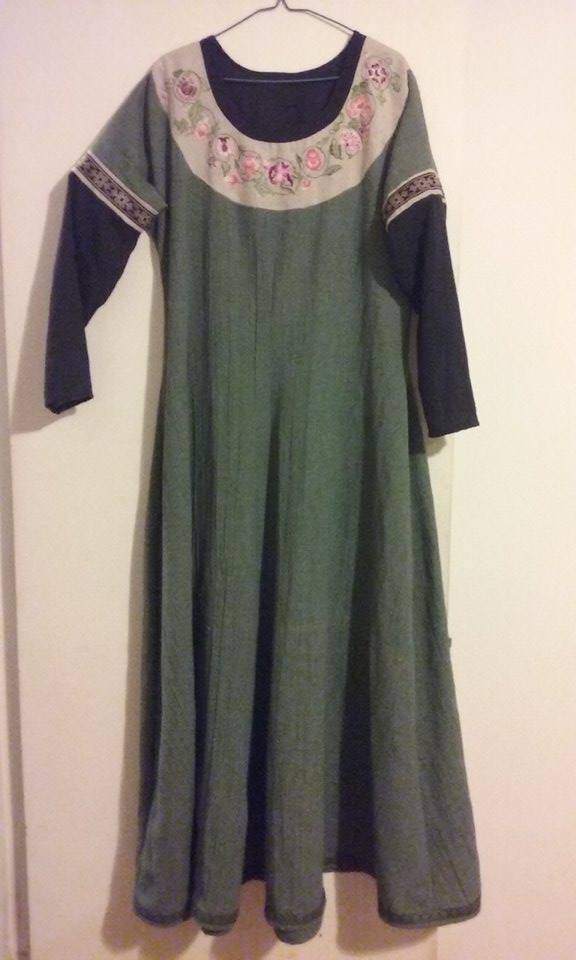
Measuring, Yardages and Other Sewing Advice Using Enid’s Bliaut Pattern by Mistress Enid d’Auliere

Today I want to talk to you about how to use my bliaut pattern. It’s fine to get a drawing, but how do you size it to fit? How much fabric does this take and what type of fabrics are best? Well, I’m going to answer all that for you.

floral bliaut color story

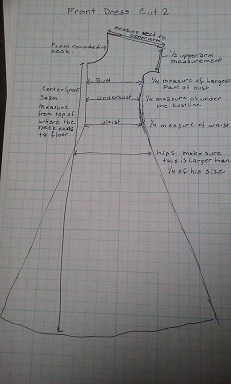
Sizing It Up: Begin with measuring. I’m going to provide you with a list of what to measure. Do not measure tightly, make sure you’re not pulling the tape as tight as you can, measure to the body you’re working with, because that’s the one that will be wearing this garment. It really looks best skimming the body and providing that graceful silouette rather than being skin tight. Keep that in mind.

Neck

Neck to shoulder end (arm held out)

Shoulder end to wrist

Upper Arm (around shoulder joint)

Arm below shoulder

Wrist

Top of shoulder neck to bottom middle neck – There is more neck in the front than there is in the back, so this is to help you shape your neckline. How far is it from the top of your shoulder where it meets your neck around to the center of your front neck. Use a tape measure and curve it so it’s comfortable. You can always make a neck larger. You can’t make it smaller.

Chest

Underbust (just below the bustline where most people are smallest)

Waist

Upper Hip (3 in below waistline)

Hips (largest part)

Shoulder to Floor Front

Shoulder to Floor Back – The reason I’m measureing the front and back seperately is because often those two measurements will be different. If the measurement is longer in the back and than the front, you can adjust for this by curving the bottom hem down (like a mini train) to make up for the difference and the dress will be even all the way around.

Waist to Floor Front

Waist to Floor Back – The reason again has to do with getting a proper fit. This measurement will tell you where to begin angling the pattern out and waists in the front and back aren’t always the same.

blog my bliaut pattern dress front

Now take those measurements and apply them to the pattern I provided. There are two parts that can be tricky, the neck and the underarm curve. You don’t want to cut this too tight, so be generous here. You can always cut this down. Necks are the opposite. You cut them small and they can always be made larger. You have to get really creative to make them smaller.

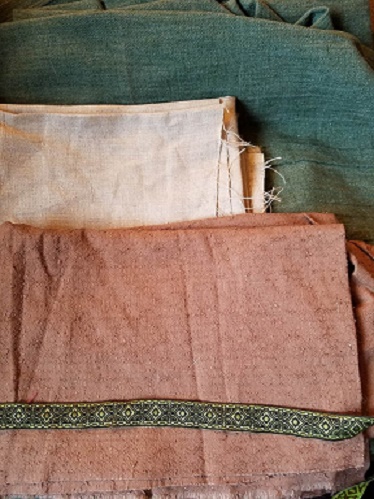
Fabrics and Yardage: I prefer a mid-weight fabric for this gown, personally. I’ve used everything from sheer fabric to heavy wool, so it’s a wide range. My preference is mid-weight, a linen or linen blend, wool or wool blend or a woven cotton. This pattern is not made for knits or stretch fabrics. The red bliaut is made from a wool blend, suit weight and it was perfect. I like fabrics with a little body to them rather than drapey fabrics. To get the skirt to flair out, the fabric needs to have some structure to it.
How to figure yardage: My rule of thumb is to take the measurement from your shoulder to floor (which ever is longer, front or back if they are different), multiply that by 4 (for the 4 parts of the dress that have to be centered in the fabric when laid out) and divide by 36 (for the number of yards). Add to that sleeves, and that will depend on the kind of sleeves you want. Angel sleeves take up a lot more yardage than straight or tight sleeves, depending on just how long you want them. Angel sleeves add a minimum of 2 yards, straight or tight sleeves, add 1 yard. That’s for fabric that is 45” wide. Fabric that is 60” wide gives you more layout options, so you can reduce the yardage by 25%. So, if the measurement from the shoulder to the floor is 50 inches, it would be 50×4=200 200/36 is 5.5 yards. Add 2 yards for angel sleeves and you come up with 7.5 yards. If you are small and can fold the fabric and come up with enough fabric to cut front and back dress, you can reduce the dress fabric needed by half.

What Else Do I Need? Good question. You will need contrasting fabric for the neckpiece (if you’re doing that), lining fabric for long sleeves, woven trim, matching thread.

The fabric for a contrasting neckpiece can be most anything. You need less than ½ yard, so go nuts. I often find upholstry fabric in tapestry and brocade patterns made a great statement. I’m into embroidering mine, but beadwork, a fabulous fabric, contrasting color or even a complimentary color can make the dress. You can add trim around the neck or around the neckpiece, the possibilities are endless.

Sleeve lining fabric is the same as you purchased for the sleeves themselves. As you can see, I like to make a statement with lining fabrics, just make sure it’s woven and not a knit.

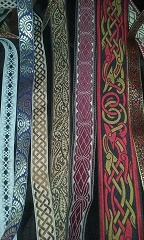
Woven trim you can find at most fabric stores, but it’s harder to find medieval trims. I shop at a place called Calontir Trims (http://calontirtrim.com). He often shows up at our local events, but that may not work for most folks reading this blog. You can shop and order trims online and have them shipped. There’s a great catalog. If you’re getting trim for the skirt hem, figure 4-5 yards. One of the reasons I like trim at the hem is that it provides structure to the hem and makes it flair out a bit more.

blog trims

Good luck. I hope this explains how to draw this pattern to fit. Afterall, a new toy isn’t any fun if you don’t know how to use it. I want you to love this pattern as much as I do. It’s adaptable, graceful and easy to wear. I’ve used it to make coats and underdresses besides bliauts.

blog coat


Next entry I’ll talk about how to sew the perfect neck. It’s really not as hard as you think. Until then.

Bliaut Patterns and Thoughts by Mistress Enid d’Auliere

While I continue to embroider, I’m going to skip ahead just a bit for those of you following me in order to learn how to make a actual bliaut. The embroidery is always the longest part and I do plan for that, but watching me make every flower and leaf and vine is a high price to pay for getting a pattern. Even for me. Let’s get to the dress, already.

Val Day Dress portrait

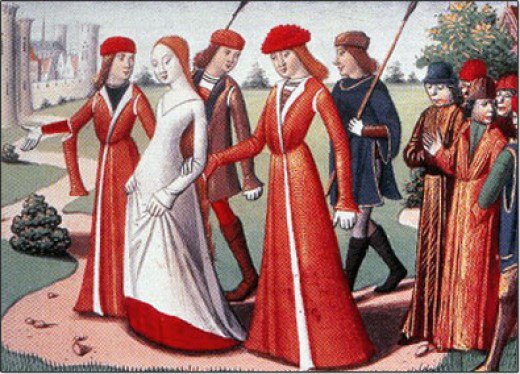
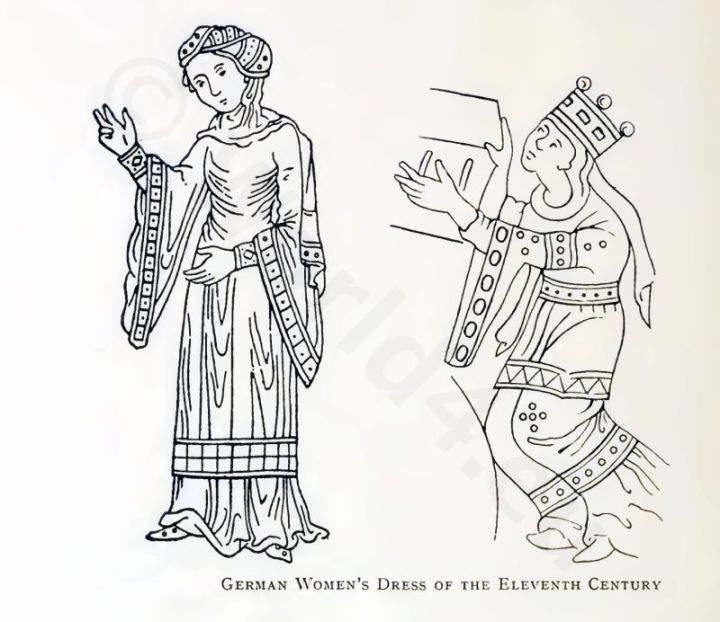
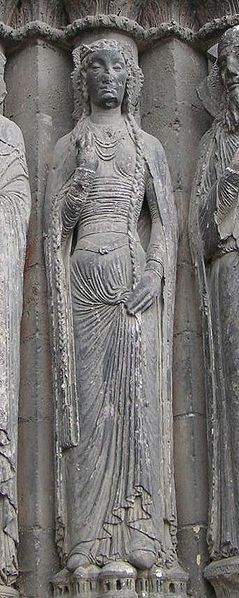
I’ve given you a history of the bliaut, which was worn for about half a century, the first half of the 12th century. It’s been a mystery just how they made the garment to get it to fit the way we see depicted in the famous statuary of Chartre Cathedral. I’ve been on a quest to understand this most misunderstood garment for decades. And then I’m going to reinterpret it for SCA uses.

Let’s begin on why the bliaut looks the way it looks. What has confused historian and costumers for centuries is the seemingly different section in the middle of the gown. It almost looks like a different dress in the mid section. Victorian romantics thought it was a seperate girdle on the dress, later historians thought the dress was made in three parts, upper bodice, mid waist and skirt, virtually impossible in the 12th century. They didn’t know how to seperate the bodice from the skirt. What has been confusing people for all these many years is fairly simply explained. When the bliaut came into fashion was during the Christian Crusades. What came back was silks never seen in Europe before. Lovely, delicate, light silks in fabulous colors (silk dyes well). Who wouldn’t want a dress from a beautiful China silk or a sheer silk gauze? Well, if they were anything like me, the answer was everyone wants a beautiful silk gown, and every lady who could afford it probably had one.

Now, the sewing skill of the period was rudimentary at best. Most garments were loose and unfitted, held by belts for both men and women. The difference between the rich and the poor was the quality of fabric and the embellishment on the garment. Not in the style. Until the bliaut.

bliau original drawings

The bliaut was different. It was the first well fitted garment for women. It was a style that flattered both the female form and the fabulous fabric it was made from. The long sleeves looked angelic, but also were a affectation of the nobility. With sleeves like those, you aren’t expected to labor. Trust me, you can’t actually work in sleeves like the long angel wing sleeves favored in the period. But you could show off how much fabric you could afford. They take a lot more fabric than normal sleeves and the longer they are, the more fabric they take to make. Some such sleeves I’ve made take 4-5 yards of fabric alone. If that isn’t wearing a Porshe, I don’t know what is.

The dress mid section, the mysterious mid section is explained by understanding how fabric works in certain stresses. The bliaut was made to fit by lacing up both sides tightly, from under the arms to the hips. Light fabrics, when they’re laced, bunch up unless the side seams are reinforced with boning or a sturdy fabric. Light silk fabrics, or light fabrics in general, use lacing like gathering. The tighter the sides are pulled, the more the fabric would gather making a “roushed” look to the middle of the dress.

bliaut chartres 2

The skirt is made larger (and having that pleated look) by adding fabric gores to the skirt in both the front sides and back. The gores are basically triangles of fabric added to the front, side, and back seams to create a wider skirt. They can be inserted without seams as well, which is “advanced gore technique” to me, inserting gores into the skirt of the dress between the seams. The idea is that the more you distribute the fabric in a circle skirt, the better it will drape. And, the bigger the skirt, the more fabric it takes to make it and we’re back to conspicuous consumption medieval style. Of course, light silk would drape close to the body as shown in the statuary, being the nature of the fabric.

When we remake the bliaut in different fabrics, sturdier ones than were originally used, the dress looks different from the original depictions. With a sturdier fabric that has more strength and body, the roushing effect disappears and the skirt has more body and fans out from the hips rather than hugging them. It’s all about how different fabrics work even using the exact same pattern. The same pattern that creates the figure hugging, narrow bliaut of the pictures creates a priness style silouette in a sturdier fabric.

I actually have two bliaut patterns and I’ll share both with you. The first pattern is a historical pattern, fitted as medieval bliaut, by lacing up each side. This style dress needs a full underdress to wear like a chemise cut similarly, but made larger. The neck is made the same way I made my necks for my bliaut pattern, by using a contrasting facing technique that I promise to include in my writings further on.


The second pattern is my own bliaut pattern. There are a few differences. Instead of gores, I cut the skirt including the gores in one piece, distributing the fabric of the circle to the front, sides and back. Adding that fullness to the front skirt gives the wearer that nice drape in front that hides a multitude of body issues. I can also tailor this dress all around for a better fit, which I always do once the dress is put together. The other difference is that this dress, with this fitting, can be made to fit well, but not need to be laced in order to achieve that. It can be a slip on dress and still look great. That also means it doesn’t necessarily have to have an underdress, The summer bliaut I’m making will be one layer but made to look like the traditional two. I don’t deal with the summer heat and I need a nice piece of garb I won’t melt in.

I’ll get more into the specifics of measuring for the bliaut and sewing details later. For those of you who want to jump ahead, feel free. I’m always available for questions. Get inspired! Until next time.

Thread painting: Jacobian peach flower by Mistress Enid d’Auliere

I think by now you know how much I love flowers, so it will come as no surprise that the flowers are my favorite part of this design. After all, what is a floral without the flowers? The flowers I have used in this design are very stylized and complex, with a number of different shapes that make up the whole flower. Not only do the colors in each part of the flower need to make sense, but they need to make sense in how they work as a whole in the flower.


In this design, no two flowers are alike, so each one is a new challenge. This particular flower was many different parts, so the colors couldn’t blend as easily and each part had to be embroidered seperately. You can see how I’ve layered the seperate parts of the inner flower with thread colors, using two colors per inner shape.

The outer parts of the flower have 2-3 colors for each petal. The bottom petals have 3 colors. You can see how I layer the colors, keeping the stitches random, but not random. Rather than long and short satin stitch, it might have been called undulating satin stitch, but keep the lengths of the stitches uneven so the colors can blend into one another.

When I layer the second color on the first, I match the angle of the two colors of thread, so they are going the same way. That makes the embroidery look seamless and the colors blend. This technique is time consuming. One flower can take all day to finish. But, OH! When that last stitch goes in and the full effect of the embroidered flower becomes clear, it’s a great feeling.


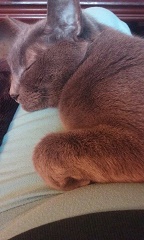
Of course, that’s when I have to move the sleeping cat off my lap.

blog embroidery cat

I’ll keep embroidering and writing. The next flower is the center of the embroidery, so soon it will be more than half done. Woo Hoo! I’m inspired. I hope you are, too. Goodbye for now.

Thread Painting with Long and Short Satin Stitch by Mistress Enid d’Auliere

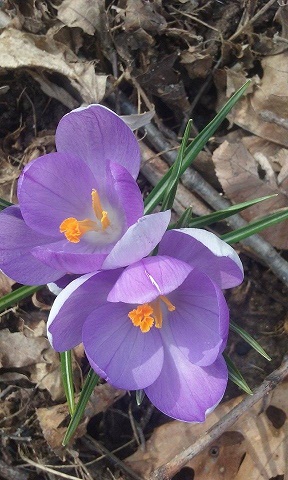
Thread painting is a way of using shading to make embroidered images have depth to them. When you look at a flower or the ocean, or the sky what takes our breath away is the shades of colors. I have seen the ocean where it goes from clear aquamarine to deep lapis within eye sight. What we love about the sunrise and sunset are the beautiful colors in the sky. We never get tired of it. What takes my breath away about flowers is the same thing, the beautiful and delicate shades of colors.

blog spring crocus flower

I love flowers and I love colors. It’s in my DNA. I love colors in any media. I was the kid who had to have the big box of crayons, with all the colors. I’m the same with embroidery floss. I have to have all the colors. So, what I love about thread painting, especially flowers, is the colors I get to use! I can get close to that delicate and beautiful shades of colors I see in the flowers in my garden. I can play with colors for different effects and to create the shapes in the flowers and leaves. I can build the leaves and flowers layer by layer using colors to achieve the depth we see all around us.

Historically, I’m taking a bit of artistic license. Few embroideries from the 14th century or earlier survive except in paintings or manuscripts, so we really don’t know what they were capable of. However, if you look at the woven tapestries of the period, like the Apocolypse Tapestries, shading is used throughout to creat depth in the design. Shading is also used in the Millefleurs Tapestries we know as the “Lady and the Unicorn”. So, shading in art was not unknown in the 14th century or earlier.

If we look at illustrated manuscripts of the period, floral motifs were fairly common, seen on many pages. Vines and leaves and flowers just lend themsleves to a circular and curving pattern naturally. In fact, we see botanical and floral themes all over Medieval art. My position is that certainly embroiderers of the day would have seen these other forms of art and been inspired to recreate it in thread. I would have been.

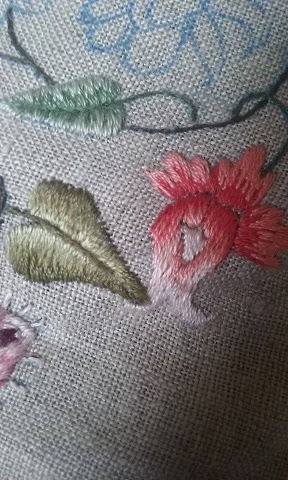
The stitches themselves are simple. I use stem stitch for the vines and the ribs of the leaves. I like to use the darker colors for this so the lighter colors of the leaves will stand out. Once the central rib of the leave is done, and side branches in the stem stitch, you can begin to fill in the leave itself.

I’ve chosen a simple leaf to begin with. Long and short satin stitch pretty much describes itself. The trick is to make the variations in length random, so it blends with the next color seamlessly. If you can’t really see where one color end and the next begins, it looks more natural. In this leaf, I’m laying down the darker green first in the center and the edges of the leaf will be lighter.


You can see how this use of color and technique creates that depth that catches your eye and has the colors we see and love in nature.

blog leaves and bud embroidery

Next time I’ll go into building the flowers with colors, but I’ve got to get busy in order to show you that part. I’ll be embroidering this weekend. See you soon!